The Bare Basics of Video Production
Wednesday, September 30th, 2015
Basic Video Production
I’ve recently started teaching film and video to school kids so that they can make their own little films. This gave me the idea for this blog to teach basic video production to people who know nothing about the basics and hoping to start making their own films.
Video Basics
The first step in basic video production is to understand what video actually is. Video is simply a series of single images being displayed in quick succession which creates movement. Different countries have varying standards at which the speed of these images should be displayed for broadcast onto television. In the UK for example the PAL standard requires that 25 of these images or frames be displayed every second that the video plays whilst in the US, the NTSC standard is 30 frames (images) a second. This is know as the frame rate. Each one of these images is made up of hundreds or thousands of pixels.
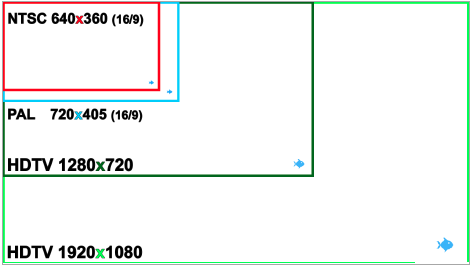
The more pixels an image contains, the higher the quality of video. This is the fundamental difference between Standard Definition Video (SD), which has hundreds of pixels, and High Definition Video (HD), which has thousands. In the UK the PAL standard for SD video is 720 pixels across the width of the video and 576 pixels in height. In the US the NTSC standard for SD video is 720 pixels across the width of the video and 480 pixels in height. High definition video has two general international standards. 720p is 1080 pixels across the width of the video and 720 pixels in height. 1080p is 1920 pixels across the width of the video and 1080 pixel in height and is currently the highest consumer and online quality available.
Camera Basics
The first thing that you need to understand about basic video production is that video captures light, and to shoot great video, you need to give the camera as much light as possible. Otherwise you will be left with a poor quality video with no detail. The cameras you will be using will automatically let in as much light as possible but in doing so will compromise the quality by making the image very pixelated. To avoid this, give your camera as much light as possible by shooting near a window or swapping a normal light bulb for a 100watt bulb. An even better idea would be to film your video outside. Although this may be a slight problem for sound, it will give you more than enough light and create a generally more interesting video than filming in an office or shop.
Video Cameras
As with most things in life you get what you pay for! The better the camera, the better the results, but the bigger the price tag. If you’re looking for high end, professional results for your video then I would recommend you use a video production company (of course) but if you haven’t got access to bigger budgets or are shooting some simple in house content then you will need some of this basic equipment. The first thing you will need of course is a camera. This can be anything from a smart phone or tablet or a handy cam. Smart phones and tablets with a video feature are pretty common nowadays. Although these can be quite expensive, the video feature is only a small percentage of that price tag. The cameras on smart phones and tablets use auto exposure and auto white balance. They also shoot at low quality but still record at a 1080p resolution. The lens on smart phones and tablets also do not have a very shallow depth of field, which limits your creativity. You can however purchase apps that allow for more creative use with the exposure and white balance. You can also buy clip on lens. Handycams are very similar to smart phones in regards to auto white balance and exposure. However they also use auto focus, which in a way limits your control of the image.
Handycams however do generally have a much higher bit rate and still record at 1080p. So the image quality should be noticeably better. Unlike smartphones, Handycams require an exterior memory unit to record video, this is most commonly in the form of an SD card. Handycams can also be similar in price, if not cheaper than some smartphones or tablets.
Video Equipment
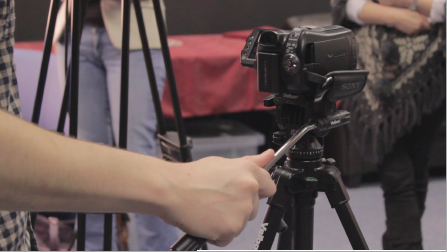
As well as a camera you will need some kind of stabilisation. Stabilisation adds quality. Unless you’re deliberately re-making The Blair Witch Project, any shakiness will result in the viewer being distracted. You can use a tripod which you can easily find on most high streets. Most consumer tripods take up very little space and are easy to setup. Although they can’t take very much weight, the vast majority of the cameras you will be using are very light. You can adjust the level, angle and height of your camera on most tripods.
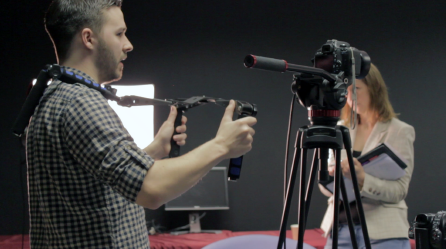
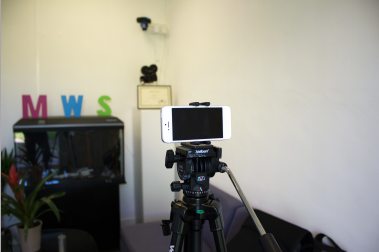
For smartphones and tablets, you will need a special adapter to allow for them to be mounted on a tripod. The other option is a rig, which is dipping slightly into the professional region. If you want to move the camera around whilst recording, a rig is your best option to make sure that you retain full control of the camera and that it remains stable.
Again for smartphones and tablets, you will need a special adapter to attach it to your rig. You can however purchase rigs especially designed for smartphones.
Audio Basics
A very important aspect of basic video production is the audio. it can sometimes be overlooked and be really detrimental to the quality of the video. Trust your ears; if it sounds bad, it will always sound bad! There are things you can fix with audio editing software, and there are things you simply can’t. A bad performance can’t be improved. Whatever the mic can hear gets recorded. Recording in silence allows the effects within the editing software to be used to create an even cleaner sounding final mix. Even with no access to editing software however, it still makes sense to record in silence anyway. Background noise will always be present on a recording and leaves an audio editor with lots more work to do trying to remove it. There are a number of different tricks you can use to create a clean recording. Avoid hard, flat surfaces, turn off air conditioning or humming fridges, go to the corner of a small room, near a drape or curtain and face the corner as you record.
Yes, in editing software you can cut sentences up and join them together, or even move individual words around. But, it never sounds quite as good as a sentence read correctly. Do multiple takes with inflections and intonations in different places, so you have options when editing your video audio track together. A charismatic performance can often disguise a not-so-great recording. An engaging performance will always capture imaginations far greater than a monotonous reading of lists of information.
Editing Basics
Probably the most important part of basic video production is the editing stage. When a camera records a piece of video it creates a high quality video file, usually in 1080p to get the best quality but other standards can be used. When filming is over, the created video files are transferred to a computer to be edited together. This will require editing software such as Windows Movie Maker or iMovie. Although there are several different editing software available, most are identical in the way they edit video.

Once you create a new project in the editing software, it will generally ask you what video from the camera you will be using. It is important to ensure that you know the frame rate of the video you recorded on the camera and at what quality it was recorded, i.e 1080p, in order to get the best possible quality of video.
Video editing software generally uses a linear system of timelines. Editing a single piece of video is as simple as locating where you want the final video to start and where you want it to end. You can then ‘cut out’ the parts of video you do not want and leaving the parts you do. For example, Video A is 90 seconds in length and placed at the beginning of the timeline. Video B is 60 seconds in length and placed after Video A on the timeline. Video A will then be displayed for 90 seconds and afterwards Video B will be displayed for 60 seconds.
Video Channel 1: Video A 90secs > Video B 60secs
Editing software also consists of various channels or layers. The key thing to remember about video channels is that any video placed on a channel ‘on top’ of another will ‘cover up’ the one below depending on the length of each video. If there is no video present in either of the channels then a black video is displayed. In the example below, Video A is placed on Video Channel 1 which is the bottom video channel. Video B is placed on Video Channel 2 which puts it above Video A and thus covers it up. If Video A is 90 seconds in length and Video B is 60 seconds in length then Video B will be visible for 60 seconds and afterwards Video A will be visible for 30 seconds.
Video Channel 2: Video B 60secs
Video Channel 1: Video A 90secs
Basic Effects
The may be basic video production but that doesn’t mean you can’t add some effects to spice things up! Most editing software comes with effects which can be applied to video. The most common is the ‘Fade out’ or ‘Fade to black’ and is a form of transition in editing. It can be used to fade into a video from black or fade out from video to black. This is placed at either the beginning or end of video. To fade in and out from one video to another (aka ‘cross dissolve’) this effect must be placed on the ‘edit’ or ‘joint’ of the two pieces of video.
Compression
The final stage of basic video production is exporting the final movie file. Once the editing is complete, it is exported out of the editing software and made into a video file. The video file created is different from the one created by the camera as it has been compressed down into a smaller video format suitable for a specific task. For example, an MPEG-2 file is ideal for a DVD as it is small enough to fit onto the disc.
Video Files
For basic video production, these are the kind of files you want to use.
MPEG-2: Highly compressed file generally used for DVD.
MPEG-4: Highly compressed for 1080p HD for web video such as Youtube.
FLV/F4V: Highly compressed for Flash video players on the web.
MOV: Slightly compressed, ideal for editing.
Audio
Audio, much like video, is edited on audio tracks on the timeline of a video editing piece of software. Usually, the audio tracks are numbered and correspond with a video track, for example Video track 1 is linked to audio track 1, 2 to 2, and so on. When footage is dragged on to the timeline to be edited, any audio recorded together with video images within a camera automatically gets placed on an audio track in sync with its corresponding video track.
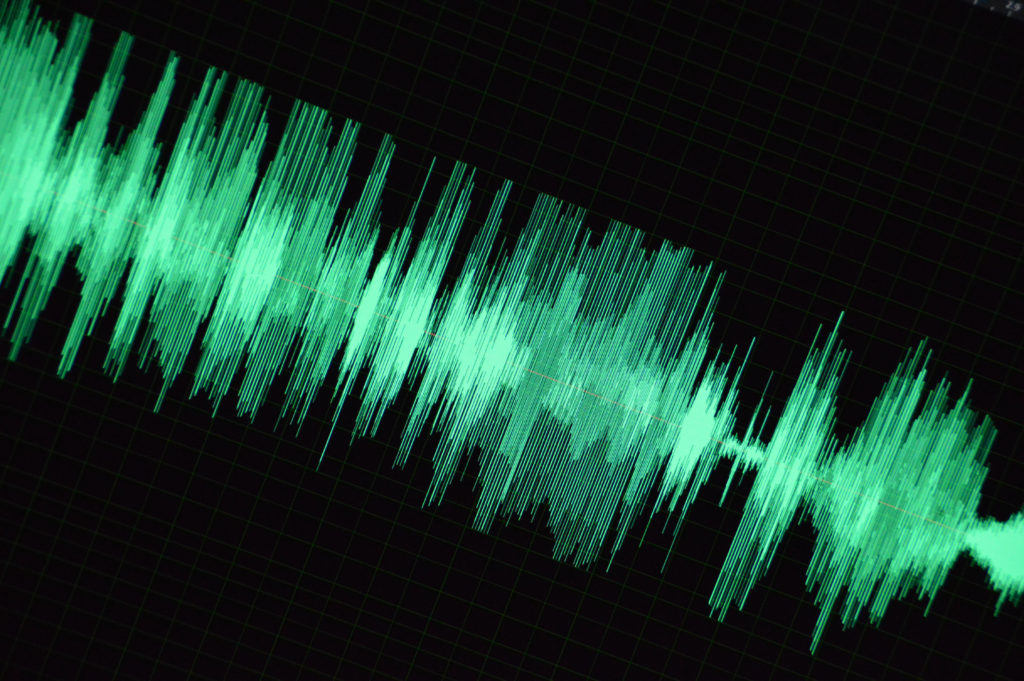
Audio that has been recorded separately from the video, on separate recording equipment for example, needs to be imported in to the project and separately synced up with the video it relates to. This can be done manually, by looking at the waveform of the separate audio and matching it to a visual cue, such as a clapper board or handclap, or software plug-ins can be purchased that do all the syncing for you. A good example of this is PluralEyes, which works with most professional editing software. The key to good sound in a video is mixing the audio levels correctly. This often gets overlooked and sound that cuts in and out, or changes levels where it shouldn’t, can sometimes be even more distracting than visual mistakes in the video editing. For a good sound mix, an editor should always be looking to utilise three basic audio mixing techniques that will solve a lot of audio-based problems; levels, compression and EQ.
Levels – balancing the levels is simply a case of using your ears to judge what level each audio clip should be in relation to the clip before it. If you’re struggling to get the level of a clip or whole section right, ask someone else for their opinion, two pairs of ears are often better than one.
Compression – basic compressors will help to reduce plosives in the audio, where the level drastically increases in a way that is uncomfortable on the ears when playing back. Drag and drop a compressor on to the audio clip and play around with the ratio and threshold settings to find what sounds best. There are plenty of good suggested compressor setting for various sounds such as musical instruments or voices on the Internet that can be found by simply searching.
EQ effects adjust the spectrum of frequencies different sounds work on. So for example you may need to boost the sound of a vocal within a mix by increasing the EQ at around 3 – 5kHz, by about 5dB. This should noticeably change how prominent a vocal is amongst the rest of the different sounds within a mix. An EQ effect is dragged and dropped on to a clip just like compression, and similarly many good EQ settings suggestion can be found by searching the Internet.
Conclusion
I hope you found that useful and that I have at least scratched the surface of basic video production. If you have any questions then please feel free to get in touch with me.
Freelance Video Producer | Commercials | Basic Video Production | Web Video | Corporate Video | Live Action | Talking Heads
IMDB | Instagram | Vimeo | LinkedIn | Facebook | Twitter
Back To Blogs